Why Make Straw and Hay Pellets? The Main Uses and Benefits
It is a smart way to transform a low-value farm by-product into a highly valuable resource by turning abundant biomass into dense, useful pellets
1. Animal Feed and Bedding
- Chicken, Duck, Sheep, Cattle: The feed pellet making machine is mainly used to make animal feed pellets.
- Balanced Nutrition: The pellet shape avoids nutrition imbalance caused by fussy animals picking only the tastiest leaves. Every bite contains a balanced mix of the whole crop.
- Waste Reduction: Animals cannot pull pellets out and trample them. They eat cleanly.
- Health: Reduced Dust significantly benefits animals with respiratory sensitivities like horses.
- Absorbency: Straw pellets are super absorbent whic can hold much more moisture than loose straw. This can help stalls drier, less odor, and a healthier environment.
2. Sustainable Biomass Fuel
- Heat Output: One pound of hay/straw pellets produces nearly 8,000 BTUs, almost equal to hardwood and close to coal.
- High Efficiency: Hay pellets boast an energy input-to-output ratio of as high as 20:1 (compared to wood at 10:1).
- Carbon Neutral: Biomass produces 90% less greenhouse gases than fossil fuels and sits well under EPA emission limits.

What You’ll Need: Raw Materials and Key Equipment
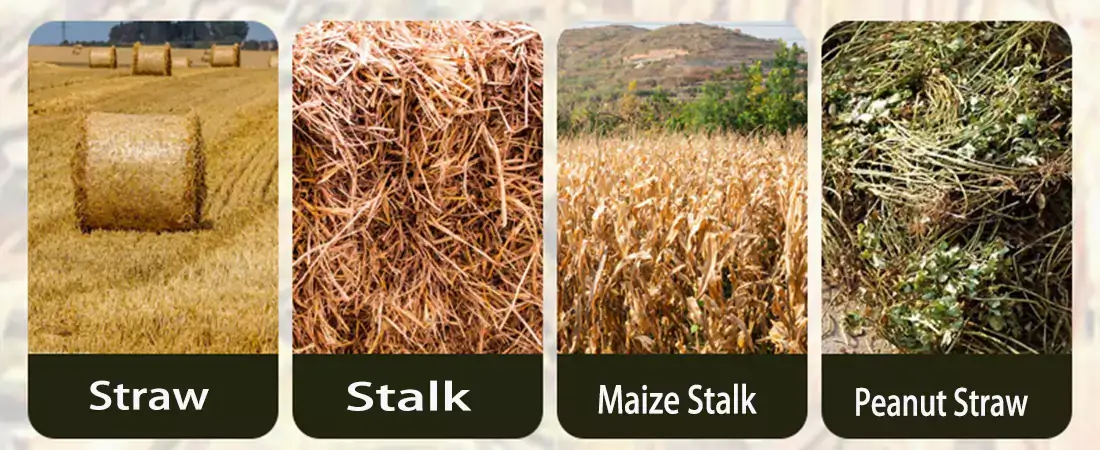
The Raw Material:
- Improved Blue Color Pellet Mill: Can process grains like corn meal, sunflower meal, wheat straw meal, stalk meal, and soybean meal.
- Biomass Residues: Wheat straw, Barley straw, Rice straw, Corn stover (stalks), Alfalfa, and Timothy hay.
- Wood: The pellet making machine can also process soft wood sawdust into pellets.
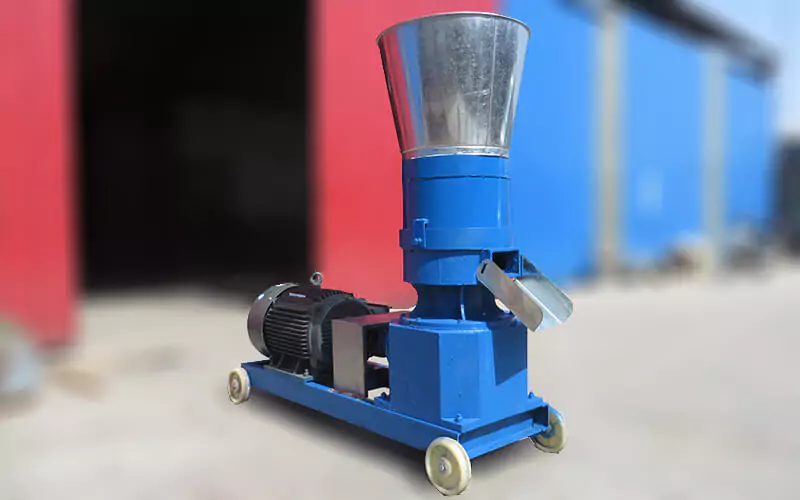
The Key Equipment:
- Two-Stage Grinder/Hammer Mill: You can not press long straw into pellets directly. It must be ground into powder at first.
- Heavy-Duty Pellet Mill: Pelleting straw is tougher than sawdust because it is highly fibrous. A sturdy, well-built biomass pellet mill with a high compression ratio is non-negotiable.
- Improved Blue Series: which is suitable for home use, small poultry farm use and medium poultry farm use.
- Production Yield: Arranges from 30 kg to 2000 kg per hour.
- Final Pellet Size: The final size can be from 2mm to 10mm.
- Moisture Meter: Your success is nearly impossible without accurately measuring the moisture content.
The Straw & Hay Pellet Making Process: Step-by-Step
Step 1: Grinding (Preparation)
- Raw materials for the pellet making machine must be in powder form.
- Use a feed grinder to reduce the length to under 10mm.
- Next, using a hammer mill grinder to grind these materials into uniform powder. For straw and biomass, grinding them to approximately 3–5 mm size which is the ideal size for smooth pelletizing.
Step 2: Moisture Control
- Straw and legume hays: Adjust the moisture to exactly 14%–16%.
- Grass hays (timothy/orchard): The target is 12%–15%.
- Blue Color Pellet Mill (Grains): Moisture requires at 6% to 10%.
- Pro Tip: Add a small amount of natural binder, like wheat gluten or lignin, if the material’s self-binding isn’t enough to maintain a high Pellet Durability Index (PDI).
Step 3: Pelleting Extrusion
- Feeding the prepared and properly moisturized powder into the straw pellet machine at a steady rate.
- High pressure between the rollers and die forces the materials into pellet with raising the temperature of about 85°C, which can activate the natural binders in the biomass to press the pellets to stick together.
Step 4: Cooling and Packing
- Pellets come out of the mill hot, steamy, and somewhat soft.
- You must use a cooler (or spread them out in a thin layer) to drop their temperature down to 35°C.
- Packing only after they have completely cooled down stops “sweat-back” and prevents mold during storage.
Why Straw Beats Wood Pellets
| Factor | Straw Pellets | Wood Pellets |
| Cost per ton | $80 – $120 | $200 – $300 |
| Ash Content | 4-6% | 0.5-2% |
| Local Supply | Abundant & Easy | Limited |
| (Note: Straw has a higher ash and alkali content, so ensure your boiler or stove is equipped for proper ash management). |
Troubleshooting Common Pelleting Problems
- Problem: “My pellets are soft and just fall apart.”
- Cause: the reason is the materials are too dry, or the compression ratio between roller and die is too low.
- Fix: Mist a tiny bit of water into your mixture. If that fails, upgrade to a die with a higher compression ratio.
- Problem: “The pellet mill keeps jamming or clogging.”
- Cause: The reason is the material moisture is too high, or feeding materials speed is too fast.
- Fix: Clear the jam safely first. Check once again the moisture which must be under 18% or 13% for specific grain mixes.
Storage and Service
- Store the final pellets in a dry place and protect from rain and moisture.
- Store the pellets with woven bags, and keep pellets dried.
- We can supply you the spare parts at any time which can make the machine works continuously.
Want to turn farm waste into profitable pellets? Check our heavy duty VTKLP series straw pellet mill and get the right model for you.
